
How to Create a Custom WPBakery Addon (Slider Example)
Posted on by Chandan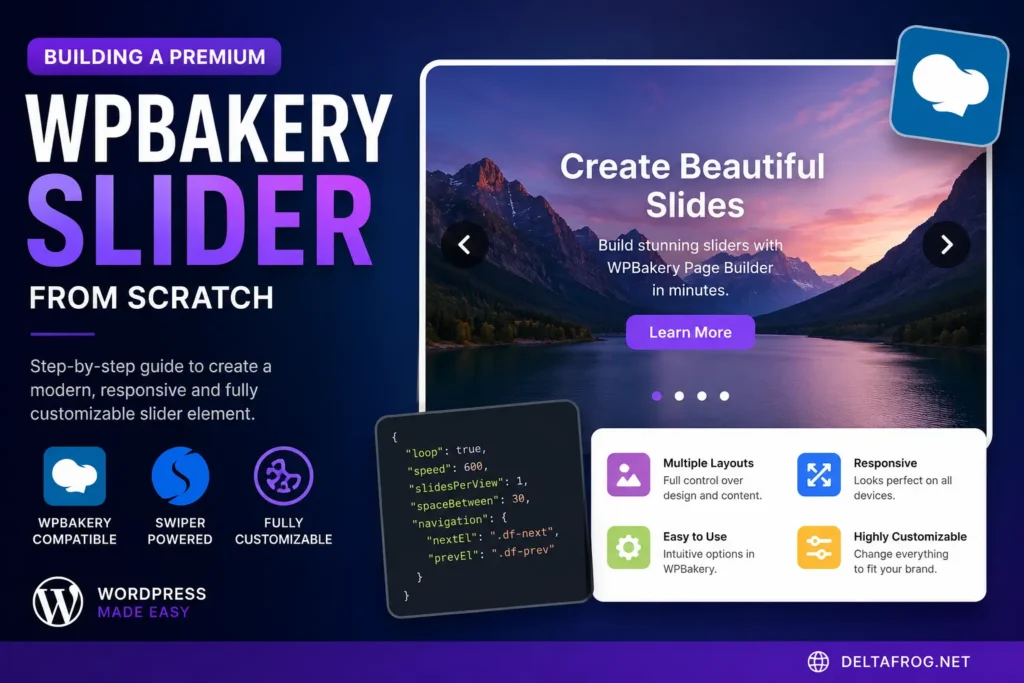
WPBakery Page Builder is one of the most popular drag-and-drop page builders for WordPress. It provides a wide range of built-in content elements that make it easy to create professional websites without writing much code. However, as your projects become more advanced, you’ll eventually need functionality that isn’t available out of the box.
A custom image slider is one of the most common requirements for modern WordPress websites. Whether you’re building a business website, portfolio, WooCommerce store, or landing page, a slider helps showcase featured content in an engaging and responsive way. While there are many WordPress slider plugins available, installing another plugin isn’t always the best solution.
Many slider plugins include dozens of features that you may never use. They often load additional CSS and JavaScript files on every page, increasing your website’s size and affecting performance. They can also introduce compatibility issues with your theme or other plugins, making long-term maintenance more difficult.
A better approach is to create your own custom WPBakery addon. By building a custom element yourself, you gain complete control over the design, functionality, HTML structure, CSS styling, and JavaScript behaviour. You can include only the features your project requires while keeping your website lightweight and easier to maintain.
In this tutorial, you’ll learn how to create a fully functional Custom Slider Addon for WPBakery Page Builder from scratch. Instead of simply copying code, we’ll explain each step so you understand how WPBakery registers custom elements, displays them in the page builder, and renders them on the front end.
What You’ll Build
Throughout this tutorial, we’ll build a reusable slider element that appears inside the WPBakery Page Builder interface just like any built-in element. Website editors will be able to add unlimited slides, upload images, enter content, configure buttons, and customize various slider settings without touching any code.
The finished slider will include:
- Unlimited slides using WPBakery’s
param_groupfield. - Image, title, description, button text, and button URL for each slide.
- Responsive layout for desktop, tablet, and mobile devices.
- Swiper.js integration for smooth touch-enabled sliding.
- Autoplay, navigation arrows, and pagination controls.
- Clean, secure, and reusable WordPress code.
Why Create Your Own WPBakery Addon?
Although there are many WPBakery extensions available, creating your own addon provides several advantages. Instead of depending on third-party plugins, you can develop elements specifically for your project’s requirements.
- Better Performance: Load only the CSS and JavaScript files your slider actually needs.
- Complete Flexibility: Customize the HTML markup, styling, animations, and functionality without plugin limitations.
- Cleaner Editor Experience: Show only the settings your content editors need instead of overwhelming them with unnecessary options.
- Easy Maintenance: Store the code inside your custom theme or functionality plugin where it can be updated alongside your project.
- Reusable Components: Once created, the addon can be reused across multiple websites with minimal changes.
Who Is This Tutorial For?
This guide is designed for WordPress developers who already have a basic understanding of WordPress themes, PHP, HTML, and CSS. You don’t need to be an expert in WPBakery development, as every important concept will be explained throughout the tutorial.
If you’ve ever wanted to create your own WPBakery elements instead of relying on additional plugins, this guide will provide the foundation you need.
Prerequisites
Before continuing, make sure you have the following:
- A working WordPress website.
- WPBakery Page Builder installed and activated.
- Access to your theme files or a custom plugin.
- A code editor such as Visual Studio Code.
- Basic knowledge of PHP and WordPress development.
What You’ll Learn
By the end of this tutorial, you’ll understand how WPBakery custom elements work and how to build your own professional addons from scratch.
- Register custom WPBakery elements using
vc_map(). - Create configurable settings panels.
- Use
param_groupto generate unlimited slides. - Render secure HTML output with WordPress shortcodes.
- Integrate Swiper.js for a modern responsive slider.
- Load scripts and styles using WordPress best practices.
- Build reusable WPBakery addons for future projects.
Let’s Get Started
Now that you understand what we’ll be building and why creating your own WPBakery addon is beneficial, it’s time to look at how WPBakery works behind the scenes. In the next section, you’ll learn how custom elements are registered using vc_map(), how they connect to WordPress shortcodes, and how the page builder renders them on your website.
Understanding How WPBakery Addons Work
Before writing any code, it’s important to understand how WPBakery Page Builder creates and displays its elements. Once you understand the workflow, you’ll be able to build not only sliders but also testimonials, pricing tables, team members, blog grids, accordions, and virtually any custom component you can imagine.
At first glance, WPBakery elements may look like complex widgets, but they’re actually built on top of WordPress shortcodes. WPBakery simply provides a visual interface that allows users to configure shortcode attributes without writing any code.
Whenever you drag an element into the page builder and configure its settings, WPBakery stores those settings as shortcode attributes. When the page is rendered on the front end, WordPress executes the shortcode, and your PHP function generates the HTML that visitors see.
The WPBakery Element Workflow
Every custom WPBakery element follows the same workflow. Understanding this process will make developing custom addons much easier.
- You register the element using
vc_map(). - WPBakery displays the element inside the page builder.
- The user fills in the element’s settings.
- WPBakery generates a shortcode containing those settings.
- WordPress executes the shortcode.
- Your PHP function creates the HTML output.
- The browser applies your CSS and JavaScript.
In simple terms, WPBakery acts as a visual editor, while WordPress handles the actual rendering of your content.
How a WPBakery Element is Connected
A custom WPBakery addon consists of four main parts:
- Element Registration – Registers the element inside WPBakery using
vc_map(). - Shortcode Callback – Generates the HTML output that appears on the website.
- CSS – Styles the element to match your design.
- JavaScript – Adds interactive functionality such as sliding, animations, or filtering.
These four components work together to create a complete custom element.
The Role of vc_map()
The most important function in WPBakery development is vc_map(). This function tells WPBakery that a new custom element exists and provides all the information needed to display it inside the page builder.
When you register an element using vc_map(), you define information such as:
- The element name displayed inside WPBakery.
- The shortcode that powers the element.
- The category where the element appears.
- The icon shown in the element picker.
- The settings available to the user.
Without vc_map(), WPBakery has no way of knowing that your custom element exists.
What Happens When a User Adds Your Slider?
Suppose a user drags your custom slider into the page builder, uploads three images, enters headings and descriptions, and clicks Save.
WPBakery doesn’t immediately create the HTML for the slider. Instead, it stores the information as a shortcode inside the page content.
For example, the saved content might look something like this:
[custom_slider slides="..." autoplay="true" speed="500"]When someone visits the page, WordPress detects the shortcode and executes the PHP function associated with it. That function retrieves the saved settings, generates the HTML structure, and returns it to WordPress for display.
This approach keeps the page builder flexible while allowing developers to control exactly how the final output is rendered.
Why Shortcodes Are Still Important
Even though WPBakery provides a visual editing experience, shortcodes remain the foundation of every custom element. Understanding how shortcodes work will make it much easier to develop custom addons and troubleshoot issues when they occur.
One of the biggest advantages of this system is portability. Since your element is powered by a shortcode, it can also be inserted manually into posts, pages, widgets, or template files if required.
How the Front End is Generated
When a visitor opens a page containing your custom slider, the following sequence takes place:
- WordPress loads the page content.
- The shortcode is detected.
- Your shortcode callback function is executed.
- The function generates the HTML markup.
- Your CSS styles the slider.
- Your JavaScript initializes the Swiper slider.
- The finished slider is displayed to the visitor.
Because each responsibility is separated into PHP, CSS, and JavaScript, your addon remains clean, organized, and easy to maintain.
Best Practices for Custom WPBakery Addons
Before we begin writing code, it’s worth following a few best practices that will make your addon more reliable and easier to reuse in future projects.
- Keep PHP, CSS, and JavaScript in separate files whenever possible.
- Escape all user-generated data using WordPress escaping functions such as
esc_html(),esc_attr(), andesc_url(). - Use meaningful shortcode names to avoid conflicts with plugins or themes.
- Only load CSS and JavaScript files when your element is actually used.
- Follow WordPress Coding Standards to improve readability and maintainability.
Setting Up Your Custom WPBakery Addon
Now that you understand how WPBakery Page Builder works behind the scenes, it’s time to start building your own custom addon. Before writing the actual slider code, we need to organize our files properly. A well-structured project is easier to maintain, debug, and reuse in future WordPress projects.
Although it’s possible to place all your code inside the functions.php file, this approach quickly becomes difficult to manage as your project grows. Instead, we’ll separate our WPBakery elements into their own directory and keep the CSS and JavaScript files organized.
Recommended Folder Structure
For this tutorial, we’ll assume you’re adding the custom slider to your WordPress theme. If you prefer, you can also package everything into a custom plugin later without changing much of the code.
Create the following folder structure inside your active theme.
your-theme/
│
├── functions.php
│
├── inc/
│   └── wpbakery/
│       └── custom-slider.php
│
├── assets/
│   ├── css/
│   │   └── custom-slider.css
│   │
│   └── js/
│       └── custom-slider.js
│
└── screenshot.png
This structure keeps all WPBakery elements inside a dedicated directory, while CSS and JavaScript remain inside the assets folder. If you build more custom elements later, such as testimonials, accordions, pricing tables, or team members, you can simply add additional PHP files inside the inc/wpbakery folder.
Why Organize Your Files?
Keeping your files organized provides several benefits:
- Cleaner project structure.
- Easier debugging.
- Simpler updates.
- Reusable code across multiple websites.
- Better collaboration with other developers.
Many WordPress beginners place hundreds of lines of code inside functions.php. While this may work for small projects, it quickly becomes difficult to navigate. Separating your custom elements into individual files is considered a best practice.
Creating the PHP File
Inside the inc/wpbakery folder, create a new file named:
custom-slider.phpThis file will contain everything related to your custom slider, including:
- WPBakery element registration.
- Element settings.
- Shortcode callback.
- HTML output.
Keeping everything related to the slider inside a single file makes future maintenance much easier.
Include the File in functions.php
Since WordPress only loads files that are explicitly included, we need to tell our theme to load the new addon file.
Open your functions.php file and add the following code.
<?php

require_once get_template_directory() . '/inc/wpbakery/custom-slider.php';
This line tells WordPress to load our custom slider whenever the theme is loaded.
If you’re creating multiple WPBakery elements, your functions.php file might eventually include several files.
<?php

require_once get_template_directory() . '/inc/wpbakery/custom-slider.php';
require_once get_template_directory() . '/inc/wpbakery/testimonials.php';
require_once get_template_directory() . '/inc/wpbakery/team.php';
require_once get_template_directory() . '/inc/wpbakery/accordion.php';
This modular approach keeps every element independent and much easier to manage.
Preparing Your CSS File
Next, create a stylesheet named:
assets/css/custom-slider.cssAlthough we won’t add any styling just yet, creating the file now helps establish a clean workflow.
Later in this tutorial, this file will contain:
- Slider layout.
- Typography.
- Navigation arrows.
- Pagination dots.
- Responsive breakpoints.
- Hover effects.
Preparing Your JavaScript File
Create another file named:
assets/js/custom-slider.jsThis file will be responsible for initializing Swiper.js and handling interactive functionality such as autoplay, looping, navigation buttons, and responsive behaviour.
Separating JavaScript into its own file makes debugging much easier than embedding scripts directly inside PHP templates.
Enqueue Your Assets
Now that the CSS and JavaScript files exist, they need to be loaded by WordPress.
Add the following code to your functions.php file.
<?php

function mytheme_custom_slider_assets() {

    wp_enqueue_style(
        'custom-slider',
        get_template_directory_uri() . '/assets/css/custom-slider.css',
        array(),
        '1.0'
    );

    wp_enqueue_script(
        'custom-slider',
        get_template_directory_uri() . '/assets/js/custom-slider.js',
        array('jquery'),
        '1.0',
        true
    );

}

add_action('wp_enqueue_scripts', 'mytheme_custom_slider_assets');
At this stage, the CSS and JavaScript files are empty, but WordPress is now ready to load them once we begin adding functionality.
Tip: For production websites, it’s even better to load these assets only when the slider shortcode is present on the page. This improves performance by avoiding unnecessary requests.
Checking Everything Is Working
Before moving on, verify the following:
- Your
custom-slider.phpfile exists. - The file is included inside
functions.php. - Your CSS and JavaScript files have been created.
- There are no PHP syntax errors.
- Your website loads without any warnings or fatal errors.
If everything is working correctly, your project is now ready for the most exciting part of the tutorial—creating your first custom WPBakery element.
Creating Your First Custom WPBakery Element
With our project structure in place, it’s time to create the actual WPBakery element. This is where your custom slider officially becomes part of the WPBakery Page Builder interface.
WPBakery uses the vc_map() function to register every content element. Whether you’re creating a simple text block, a pricing table, a testimonial slider, or a complex carousel, every custom element starts with this function.
When you register an element using vc_map(), you’re telling WPBakery:
- What the element should be called.
- Which shortcode it should use.
- Which category it belongs to.
- Which icon should appear in the element picker.
- What settings users can configure.
Think of vc_map() as the blueprint for your custom element. It defines how the element appears inside the page builder, but it doesn’t generate any front-end output. That part will be handled later by the shortcode callback.
Register the Element
Open your custom-slider.php file and begin by creating a function to register the slider element.
<?php

function mytheme_custom_slider_element() {

    vc_map(array(

        'name'        => __('Custom Slider', 'mytheme'),

        'base'        => 'custom_slider',

        'icon'        => 'icon-wpb-images-stack',

        'category'    => __('My Theme Elements', 'mytheme'),

        'description' => __('Display a responsive image slider.', 'mytheme'),

        'params'      => array(

        )

    ));

}

add_action('vc_before_init', 'mytheme_custom_slider_element');
This is the minimum structure required to register a custom WPBakery element.
Understanding the Code
Let’s break down each part of the registration so you understand exactly what it does.
name
The name parameter defines the title users see inside WPBakery.
'name' => __('Custom Slider', 'mytheme')Choose a name that clearly describes what the element does. If you’re building multiple custom elements, use consistent naming to help editors find them quickly.
base
The base parameter is one of the most important settings because it defines the shortcode name.
'base' => 'custom_slider'Later in this tutorial, we’ll create the shortcode using exactly the same name.
[custom_slider]If the base value and the shortcode name don’t match, your element won’t work correctly.
icon
The icon determines which image appears beside your element inside the WPBakery element library.
'icon' => 'icon-wpb-images-stack'WPBakery includes several built-in icons, but you can also create your own custom SVG or font icon to better match your branding.
category
The category controls where your element appears inside WPBakery.
'category' => __('My Theme Elements', 'mytheme')Creating your own category is recommended because it keeps all of your custom elements together instead of mixing them with the default WPBakery components.
For example, you might eventually have a category containing:
- Custom Slider
- Team Members
- Testimonials
- Pricing Table
- Logo Carousel
- Feature Boxes
description
The description appears underneath the element name inside the WPBakery element picker.
'description' => __('Display a responsive image slider.', 'mytheme')Although optional, a good description helps content editors understand the purpose of the element.
params
The params array is where you’ll define all of the settings available to users.
'params' => array()Right now it’s empty because we haven’t added any options yet.
In the next section we’ll populate this array with fields such as:
- Images
- Slide Titles
- Descriptions
- Buttons
- Slider Speed
- Autoplay
- Navigation Arrows
- Pagination
What Does vc_before_init Do?
You may have noticed this line at the end of our code.
add_action('vc_before_init', 'mytheme_custom_slider_element');This WordPress hook tells WPBakery to execute your registration function before it initializes its elements.
If you forget to use this hook, your custom slider won’t appear in the WPBakery editor because it will never be registered.
Viewing Your New Element
Save your changes and open any page using WPBakery Page Builder.
Click the Add Element button and browse to the category you created.
If everything has been set up correctly, you’ll see a new element called Custom Slider in the list.
At this point, clicking the element won’t display many options because we haven’t added any parameters yet. However, seeing the element inside the editor confirms that your registration code is working correctly.
Common Registration Mistakes
If your element doesn’t appear inside WPBakery, check the following:
- WPBakery Page Builder is activated.
- Your
custom-slider.phpfile is included correctly. - The function is hooked to
vc_before_init. - There are no PHP syntax errors.
- The
vc_map()function is written correctly.
Most issues are caused by a missing semicolon, an incorrect hook, or a typo in the registration function.
Adding Parameters to Your WPBakery Slider
Now that our custom slider has been successfully registered in WPBakery Page Builder, it’s time to make it useful by adding configurable options. Without parameters, the element would simply appear in the WPBakery editor without allowing users to customize its content.
Parameters are the fields that users interact with when editing an element. Every textbox, dropdown, checkbox, image uploader, color picker, and repeater field inside WPBakery is defined within the params array of the vc_map() function.
Choosing the right parameter type is important because it improves the editing experience and ensures users can configure the element without confusion.
How Parameters Work
Each parameter is defined as an array containing information such as the field type, heading, parameter name, default value, and optional description.
A basic parameter looks like this:
array(
    'type'        => 'textfield',
    'heading'     => __('Slider Title', 'mytheme'),
    'param_name'  => 'title'
)
When the user enters a value, WPBakery stores it as a shortcode attribute, making it available inside your shortcode callback function.
Common WPBakery Parameter Types
WPBakery includes many different parameter types. Some are simple text fields, while others allow file uploads, color selection, or even nested repeaters.
The following are the parameter types you’ll use most often when building custom addons.
1. Text Field
The textfield parameter is used for short pieces of text such as titles, labels, CSS classes, or IDs.
array(
    'type'       => 'textfield',
    'heading'    => __('Slider Title', 'mytheme'),
    'param_name' => 'title'
)
This is one of the simplest and most commonly used parameter types.
2. Textarea
Use a textarea whenever users need to enter longer content, such as descriptions or introductory text.
array(
    'type'       => 'textarea',
    'heading'    => __('Description', 'mytheme'),
    'param_name' => 'description'
)
3. Dropdown
The dropdown parameter allows users to choose one option from a predefined list.
array(
    'type'       => 'dropdown',
    'heading'    => __('Autoplay', 'mytheme'),
    'param_name' => 'autoplay',
    'value'      => array(
        'Yes' => 'yes',
        'No'  => 'no'
    )
)
Dropdowns are useful for limiting user input and preventing invalid values.
4. Checkbox
Checkboxes are ideal for enabling or disabling optional features.
array(
    'type'       => 'checkbox',
    'heading'    => __('Show Navigation', 'mytheme'),
    'param_name' => 'navigation',
    'value'      => array(
        'Yes' => 'yes'
    )
)
You’ll commonly use checkboxes for features such as navigation arrows, pagination, looping, or autoplay.
5. Attach Image
The attach_image parameter allows users to upload or select a single image from the WordPress Media Library.
array(
    'type'       => 'attach_image',
    'heading'    => __('Slide Image', 'mytheme'),
    'param_name' => 'image'
)
The value returned is the attachment ID, which can later be converted into an image using WordPress functions like wp_get_attachment_image().
6. Attach Images
If your element needs multiple images, you can use the attach_images parameter.
array(
    'type'       => 'attach_images',
    'heading'    => __('Gallery Images', 'mytheme'),
    'param_name' => 'gallery'
)
This field returns a comma-separated list of image IDs.
7. Color Picker
The colorpicker field allows users to choose colors directly from the WPBakery interface.
array(
    'type'       => 'colorpicker',
    'heading'    => __('Background Color', 'mytheme'),
    'param_name' => 'background'
)
This is useful when building highly customizable elements.
8. CSS Editor
WPBakery also includes a built-in CSS editor that allows users to configure margins, padding, borders, and spacing visually.
array(
    'type'       => 'css_editor',
    'heading'    => __('Design Options', 'mytheme'),
    'param_name' => 'css',
    'group'      => __('Design', 'mytheme')
)
This parameter is optional but provides additional flexibility without requiring custom CSS.
Introducing param_group
Although the parameter types above are useful, they aren’t enough for building a slider. A slider needs multiple slides, and each slide requires its own image, title, description, button, and link.
Creating separate fields for every slide would be impractical because you wouldn’t know in advance how many slides a user wants to add.
This is where param_group becomes one of the most powerful features in WPBakery.
A param_group acts like a repeater field, allowing users to create an unlimited number of items. Each item can contain multiple child fields, making it perfect for sliders, testimonials, team members, FAQs, timelines, pricing plans, and many other components.
For our custom slider, each repeated item will include:
- Slide image
- Heading
- Description
- Button text
- Button URL
Content editors will simply click the Add Item button whenever they need another slide.
Organizing Parameters into Groups
As your custom element grows, the settings window can become crowded. WPBakery allows you to organize parameters into tabs using the group property.
For example, you might organize your slider like this:
- Slides — Images and content
- Slider Settings — Speed, autoplay, looping
- Navigation — Arrows and pagination
- Design — Colors, spacing, typography
Grouping related settings makes your addon much easier to use, especially for clients who are not familiar with WordPress development.
Planning Our Slider Settings
Before writing the complete param_group code, let’s decide which options our slider should include.
- Unlimited slides
- Slide image
- Slide title
- Slide description
- Button text
- Button link
- Autoplay option
- Slider speed
- Loop option
- Navigation arrows
- Pagination dots
This combination provides enough flexibility for most business websites while keeping the editor clean and easy to understand.
Now that you’re familiar with WPBakery parameter types, it’s time to build the heart of our slider. In the next section, we’ll create a param_group that allows users to add unlimited slides, each with its own image, content, and button. You’ll also learn how WPBakery stores repeater data and how to retrieve it inside your shortcode.
Building the Slider with param_group
Now it’s time to build the most important part of our custom WPBakery addon. So far, we’ve registered our element and learned about the different parameter types available in vc_map(). However, a slider requires multiple slides, and we don’t know how many slides a user will want to add.
Instead of creating separate fields like Slide 1, Slide 2, and Slide 3, WPBakery provides a much better solution called param_group.
A param_group works like a repeater field. It allows users to create as many items as they need, with each item containing its own set of fields. This makes it perfect for sliders, testimonials, FAQs, pricing tables, team members, timelines, and many other custom elements.
What is param_group?
The param_group parameter creates a repeatable collection of fields. Every time the user clicks the + Add Item button, WPBakery creates another group of fields.
For our custom slider, each slide will contain:
- Slide Image
- Slide Title
- Slide Description
- Button Text
- Button Link
This approach makes the slider completely dynamic because users can create two slides, ten slides, or even fifty slides without modifying the code.
Adding the Slider Repeater
Replace the empty params array with the following code.
'params' => array(

    array(

        'type'       => 'param_group',

        'heading'    => __('Slides', 'mytheme'),

        'param_name' => 'slides',

        'description'=> __('Add, remove and reorder your slides.', 'mytheme'),

        'params'     => array(

            array(
                'type'       => 'attach_image',
                'heading'    => __('Slide Image', 'mytheme'),
                'param_name' => 'image'
            ),

            array(
                'type'       => 'textfield',
                'heading'    => __('Slide Title', 'mytheme'),
                'param_name' => 'title'
            ),

            array(
                'type'       => 'textarea',
                'heading'    => __('Slide Description', 'mytheme'),
                'param_name' => 'description'
            ),

            array(
                'type'       => 'textfield',
                'heading'    => __('Button Text', 'mytheme'),
                'param_name' => 'button_text'
            ),

            array(
                'type'       => 'vc_link',
                'heading'    => __('Button Link', 'mytheme'),
                'param_name' => 'button_link'
            )

        )

    )

)
This single block of code creates a complete repeater inside the WPBakery editor.
How It Appears Inside WPBakery
After saving your changes and refreshing the editor, you’ll notice that your Custom Slider element now includes a new section called Slides.
When users click the Add Item button, they’ll see fields for:
- Uploading a slide image.
- Entering a slide title.
- Writing a short description.
- Adding button text.
- Selecting a button link.
Each click on Add Item creates another slide. Users can also drag and drop slides to change their order, making it easy to manage large sliders.
Understanding Each Field
Slide Image
The attach_image parameter lets users choose an image from the WordPress Media Library. WPBakery stores the attachment ID, allowing us to retrieve the image later using WordPress functions.
Slide Title
The title is displayed as the main heading of each slide. We use a simple textfield because the content is usually short.
Slide Description
The description provides additional information about the slide. Since descriptions can be longer than titles, a textarea is more appropriate.
Button Text
This field lets users define the text displayed on the call-to-action button, such as Learn More, Shop Now, or Get Started.
Button Link
Instead of asking users to paste a URL manually, WPBakery provides the vc_link parameter. This field opens a link selector where users can choose internal pages or enter external URLs. It also supports options such as opening the link in a new tab and adding a title.
Why Use vc_link Instead of a Text Field?
Many beginners use a simple text field for links, but vc_link offers several advantages.
- Built-in URL validation.
- Support for internal and external links.
- Target options such as opening in a new tab.
- Cleaner editing experience for users.
Using the correct parameter type improves both usability and data quality.
How WPBakery Stores Repeater Data
When a user saves the slider, WPBakery doesn’t create multiple shortcodes. Instead, it stores all slide information inside a single shortcode attribute.
The data is encoded into a string that contains every slide and its associated fields. Later, we’ll use the vc_param_group_parse_atts() function to convert this encoded data into a PHP array that can be looped through.
This process happens automatically, so developers don’t need to manually parse or decode the values.
Testing Your Slider Configuration
Before moving on, it’s a good idea to test the editor.
- Add your Custom Slider element to a page.
- Create three or four slides.
- Upload different images.
- Add titles and descriptions.
- Configure different button links.
- Save the page.
Although the slider won’t appear on the front end yet, this test confirms that WPBakery is correctly saving all of your data.
Best Practices When Using param_group
- Keep the number of fields reasonable to avoid overwhelming users.
- Use clear labels and helpful descriptions.
- Choose the most appropriate parameter type for each field.
- Group related settings together for better organization.
- Only collect the data you actually need.
A well-designed settings panel makes your addon much easier for clients and content editors to use.
Our custom slider can now collect all the information needed to build each slide. The next step is to create the shortcode callback that processes this data, loops through every slide, and generates the HTML structure displayed on the front end. We’ll also learn how to use vc_param_group_parse_atts() to convert the stored slider data into a usable PHP array.
Creating the Shortcode to Display the Slider
Our custom WPBakery element can now collect slide information from the editor, but it still doesn’t display anything on the front end. That’s because vc_map() only creates the settings panel inside WPBakery—it doesn’t generate the HTML that visitors see.
To display the slider, we need to create a WordPress shortcode. This shortcode will receive all the values entered in the WPBakery editor, process them, and generate the HTML for each slide.
If you’ve developed WordPress themes or plugins before, you’ll already be familiar with shortcodes. The only difference here is that WPBakery automatically generates the shortcode and passes the configured values to it.
Registering the Shortcode
Inside your custom-slider.php file, add the following code below your vc_map() function.
function mytheme_custom_slider_shortcode( $atts ) {

    // Shortcode output will go here

}

add_shortcode( 'custom_slider', 'mytheme_custom_slider_shortcode' );
Notice that the shortcode name matches the base value we defined earlier in vc_map().
'base' => 'custom_slider'If these names don’t match exactly, WordPress won’t know which function should generate the slider.
Receiving the Slider Settings
The $atts variable contains every setting entered by the user inside WPBakery.
It’s good practice to define default values using the WordPress shortcode_atts() function. This prevents PHP notices if certain options are left empty.
function mytheme_custom_slider_shortcode( $atts ) {

    $atts = shortcode_atts( array(

        'slides' => ''

    ), $atts );

}
At the moment we’re only retrieving the slides parameter because that’s the only field we’ve created.
Parsing the param_group
Unlike normal text fields, a param_group isn’t stored as a simple string. WPBakery encodes the data before saving it.
Fortunately, WPBakery provides a helper function that converts this encoded data into a normal PHP array.
$slides = vc_param_group_parse_atts( $atts['slides'] );
After this line runs, the $slides variable contains an array of all slider items entered by the user.
Each slide now includes values such as:
- Image ID
- Title
- Description
- Button Text
- Button Link
This makes it easy to loop through each slide and generate the HTML dynamically.
Checking for Empty Slides
Before generating any output, it’s always good practice to verify that the slider actually contains items.
if ( empty( $slides ) ) {
    return;
}
This prevents empty HTML containers from being displayed when no slides have been added.
Starting the HTML Output
There are several ways to generate HTML inside a shortcode. For larger components like sliders, using output buffering keeps the code clean and easy to read.
ob_start();
Output buffering captures everything printed after this line and stores it in memory instead of sending it directly to the browser.
At the end of the shortcode, we’ll simply return the buffered content.
Looping Through Each Slide
Now we can loop through every slide created in the WPBakery editor.
<div class="my-slider">

    <div class="swiper-wrapper">

        <?php foreach ( $slides as $slide ) : ?>

        <div class="swiper-slide">

        </div>

        <?php endforeach; ?>

    </div>

</div>
Each iteration represents one slide created by the user.
If the user added five slides in WPBakery, this loop will generate five .swiper-slide elements automatically.
Retrieving Individual Values
Inside the loop, each field can be accessed just like a normal PHP array.
$image        = $slide['image'] ?? '';
$title        = $slide['title'] ?? '';
$description  = $slide['description'] ?? '';
$button_text  = $slide['button_text'] ?? '';
$button_link  = $slide['button_link'] ?? '';
Using the null coalescing operator (??) prevents PHP warnings if a field has been left empty.
Displaying the Image
The image field stores the WordPress attachment ID, not the image URL.
The easiest way to display the image is with wp_get_attachment_image().
echo wp_get_attachment_image(
    $image,
    'large',
    false,
    array(
        'class' => 'slider-image'
    )
);
This function automatically generates responsive image markup using WordPress image sizes, making it a much better choice than manually building an <img> tag.
Displaying the Content Safely
Whenever you’re displaying user-entered content, always escape it using the appropriate WordPress function.
<h2><?php echo esc_html( $title ); ?></h2>

<p><?php echo esc_html( $description ); ?></p>
Escaping output helps protect your website from malformed content and follows WordPress coding standards.
Handling the Button Link
The vc_link parameter doesn’t return a simple URL. Instead, it stores several values, including the URL, title, target, and relationship attributes.
WPBakery provides another helper function to extract these values.
$link = vc_build_link( $button_link );
You can then access the individual properties like this:
$url    = $link['url'];
$target = $link['target'];
$title  = $link['title'];
These values can be used to generate a fully functional button.
Returning the Slider
Once all slides have been generated, return the buffered HTML.
return ob_get_clean();
This sends the completed slider markup back to WordPress, where it replaces the shortcode on the page.
Current Progress
At this stage, we’ve successfully connected the WPBakery editor to the front end.
Our slider can now:
- Receive all settings entered by the user.
- Parse the
param_groupdata. - Loop through unlimited slides.
- Retrieve images, titles, descriptions, and links.
- Generate dynamic HTML output.
Although the HTML structure is complete, the slider still won’t slide because we haven’t integrated a JavaScript slider library yet.
In the next section, we’ll integrate Swiper.js to transform our static HTML into a fully responsive, touch-enabled slider. You’ll learn how to enqueue the required files, initialize Swiper, add navigation arrows, pagination dots, autoplay, looping, and responsive breakpoints to create a professional slider experience.
Adding Swiper.js to Your Custom WPBakery Slider
Our custom WPBakery addon can now generate the HTML structure for the slider, but the slides are still displayed as ordinary HTML elements. To transform them into a modern, responsive, and touch-friendly slider, we need a JavaScript library.
There are many slider libraries available, including Slick Slider, Owl Carousel, Splide, Glide.js, and Swiper.js. For this tutorial, we’ll use Swiper.js because it’s lightweight, mobile-friendly, actively maintained, and packed with useful features.
Swiper.js supports:
- Touch gestures for mobile devices
- Responsive breakpoints
- Loop mode
- Autoplay
- Navigation arrows
- Pagination dots
- Lazy loading
- Keyboard navigation
- Mouse wheel support
Best of all, it works perfectly with custom WPBakery elements.
Step 1: Download Swiper.js
The easiest way to use Swiper.js in a WordPress theme is to download the latest version from the official website.
Extract the downloaded files and copy the following into your theme.
your-theme/

assets/

    swiper/

        swiper-bundle.min.css

        swiper-bundle.min.js
Keeping third-party libraries inside an assets directory makes them easier to update in the future.
Step 2: Enqueue Swiper Assets
Next, load both the Swiper stylesheet and JavaScript file using WordPress’s enqueue functions.
function mytheme_custom_slider_assets() {

    wp_enqueue_style(
        'swiper',
        get_template_directory_uri() . '/assets/swiper/swiper-bundle.min.css',
        array(),
        '11.0.0'
    );

    wp_enqueue_style(
        'custom-slider',
        get_template_directory_uri() . '/assets/css/custom-slider.css',
        array('swiper'),
        '1.0'
    );

    wp_enqueue_script(
        'swiper',
        get_template_directory_uri() . '/assets/swiper/swiper-bundle.min.js',
        array(),
        '11.0.0',
        true
    );

    wp_enqueue_script(
        'custom-slider',
        get_template_directory_uri() . '/assets/js/custom-slider.js',
        array('swiper'),
        '1.0',
        true
    );

}

add_action( 'wp_enqueue_scripts', 'mytheme_custom_slider_assets' );
This ensures that Swiper loads before your custom JavaScript.
Developer Tip: If your website already uses Swiper.js elsewhere, don’t enqueue it twice. Instead, reuse the existing registered script to avoid duplicate downloads and potential conflicts.
Step 3: Prepare the HTML Structure
Swiper requires a specific HTML structure to function correctly. Fortunately, our shortcode already outputs most of it.
Your slider should look similar to this.
<div class="custom-slider swiper">

    <div class="swiper-wrapper">

        <div class="swiper-slide">

            Slide Content

        </div>

        <div class="swiper-slide">

            Slide Content

        </div>

    </div>

</div>
The important classes are:
- swiper – Main slider container.
- swiper-wrapper – Holds all slides.
- swiper-slide – Individual slide.
Without these class names, Swiper won’t initialize correctly.
Step 4: Add Navigation Controls
Most sliders include navigation arrows to allow visitors to browse manually.
Add these elements immediately after the swiper-wrapper.
<div class="swiper-button-prev"></div>

<div class="swiper-button-next"></div>

<div class="swiper-pagination"></div>
Swiper automatically detects these elements when the corresponding options are enabled.
Step 5: Initialize Swiper
Open your custom-slider.js file and create a new Swiper instance.
document.addEventListener('DOMContentLoaded', function () {

    new Swiper('.custom-slider', {

        slidesPerView: 1,

        spaceBetween: 30,

        loop: true,

        autoplay: {

            delay: 4000,

            disableOnInteraction: false

        },

        pagination: {

            el: '.swiper-pagination',

            clickable: true

        },

        navigation: {

            nextEl: '.swiper-button-next',

            prevEl: '.swiper-button-prev'

        }

    });

});
That’s all it takes to create a fully functional responsive slider.
Understanding the Configuration
Let’s look at what each option does.
slidesPerView
This determines how many slides are visible at one time.
slidesPerView: 1For hero sliders, one slide is usually the best choice.
spaceBetween
Controls the gap between slides.
spaceBetween: 30This value is measured in pixels.
loop
Enables infinite scrolling.
loop: trueWhen enabled, visitors can continue sliding forever without reaching an end.
autoplay
Automatically advances to the next slide.
autoplay: {

    delay: 4000

}
The delay value is measured in milliseconds.
navigation
Activates the previous and next buttons.
navigation: {

    nextEl: '.swiper-button-next',

    prevEl: '.swiper-button-prev'

}
pagination
Displays clickable pagination dots below the slider.
pagination: {

    el: '.swiper-pagination',

    clickable: true

}
Making the Slider Responsive
One of Swiper’s biggest advantages is its responsive breakpoint system. Instead of creating complicated media queries in JavaScript, you simply define different settings for different screen sizes.
breakpoints: {

    768: {

        slidesPerView: 2

    },

    1024: {

        slidesPerView: 3

    }

}
This configuration displays:
- 1 slide on mobile devices.
- 2 slides on tablets.
- 3 slides on desktop screens.
For a hero banner, you’ll usually keep slidesPerView: 1, but breakpoints become very useful for product sliders, blog carousels, logo sliders, and testimonial sections.
Testing Your Slider
After saving your changes, refresh your website and add the Custom Slider element to a page.
If everything has been configured correctly, you should now have:
- Working slide transitions.
- Navigation arrows.
- Pagination dots.
- Touch support on mobile devices.
- Automatic slide rotation.
- Responsive behaviour.
At this point, you’ve built a fully functional slider addon for WPBakery Page Builder. However, it still has a very basic appearance because we haven’t added any styling.
In the next section, we’ll style our custom slider using CSS. We’ll create a professional layout with responsive typography, properly sized images, content positioning, navigation styling, hover effects, and mobile optimizations. By the end of that section, your custom WPBakery slider will look like a polished, production-ready component instead of a basic demo.
Styling Your Custom WPBakery Slider with CSS
Now that our slider is fully functional, it’s time to make it visually appealing. While Swiper.js handles the sliding functionality, it doesn’t provide a complete design. Without custom CSS, your slider will simply display stacked content with basic navigation controls.
Creating your own CSS gives you complete control over the appearance of the slider. Whether you’re building a full-width hero banner, a testimonial carousel, a product showcase, or a portfolio slider, the styling process follows the same principles.
In this section, we’ll create a clean, responsive layout that works well on desktop, tablet, and mobile devices.
Basic Slider Structure
Let’s first look at the HTML structure generated by our shortcode.
<div class="custom-slider swiper">

    <div class="swiper-wrapper">

        <div class="swiper-slide">

            <div class="slide-image">
                Image
            </div>

            <div class="slide-content">

                <h2>Slide Title</h2>

                <p>Slide description...</p>

                <a href="#">Learn More</a>

            </div>

        </div>

    </div>

</div>
Keeping a consistent HTML structure makes your CSS much easier to write and maintain.
Creating the Main Container
Start by styling the main slider container.
.custom-slider{
    position:relative;
    overflow:hidden;
    width:100%;
}
This ensures that overflowing slides remain hidden during transitions.
Styling Individual Slides
Each slide should occupy the full width of the slider while maintaining a flexible layout.
.custom-slider .swiper-slide{

    display:flex;

    align-items:center;

    justify-content:center;

    position:relative;

}
Using Flexbox makes it easy to center content vertically and horizontally.
Making Images Responsive
Images are often the largest assets on a page, so they should scale gracefully across different screen sizes.
.slide-image img{

    width:100%;

    height:auto;

    display:block;

}
This prevents image distortion while maintaining the correct aspect ratio.
If your slider requires a consistent image height, you can use the following approach instead.
.slide-image{

    aspect-ratio:16/9;

    overflow:hidden;

}

.slide-image img{

    width:100%;

    height:100%;

    object-fit:cover;

}
The object-fit: cover; property ensures that every image fills the container without stretching.
Styling the Content Area
The slide content should have enough spacing to remain readable.
.slide-content{

    padding:40px;

    max-width:700px;

}
If your design places text over the image, you may also want to add a semi-transparent overlay.
.slide-content{

    position:absolute;

    left:8%;

    top:50%;

    transform:translateY(-50%);

    color:#fff;

}
This creates the classic hero banner layout seen on many modern websites.
Typography
Well-balanced typography makes a huge difference to the overall appearance of your slider.
.slide-content h2{

    font-size:clamp(32px,4vw,64px);

    line-height:1.1;

    margin-bottom:20px;

}

.slide-content p{

    font-size:18px;

    line-height:1.7;

    margin-bottom:30px;

}
Using the clamp() function allows text to scale naturally between mobile and desktop devices.
Creating a Modern Button
Your call-to-action button should be easy to identify and interact with.
.slide-content a{

    display:inline-flex;

    align-items:center;

    justify-content:center;

    padding:14px 32px;

    border-radius:50px;

    text-decoration:none;

    transition:.3s;

}

.slide-content a:hover{

    transform:translateY(-2px);

}
Small hover animations help make the interface feel more interactive without becoming distracting.
Styling Navigation Arrows
Swiper automatically creates navigation controls, but they can be customized to match your website.
.swiper-button-next,
.swiper-button-prev{

    width:54px;

    height:54px;

    border-radius:50%;

}
Many developers also replace Swiper’s default arrows with custom SVG icons to better match the site’s branding.
Customizing Pagination Dots
Pagination indicators help visitors understand how many slides are available.
.swiper-pagination-bullet{

    width:12px;

    height:12px;

}

.swiper-pagination-bullet-active{

    transform:scale(1.3);

}
Small design changes like these help create a more polished user experience.
Adding Responsive Styles
Every custom WPBakery addon should be tested on different devices. Mobile users now account for a significant percentage of website traffic, making responsive design essential.
@media(max-width:991px){

    .slide-content{

        padding:25px;

    }

}

@media(max-width:767px){

    .slide-content{

        position:relative;

        transform:none;

        left:auto;

        top:auto;

        padding:20px;

    }

}
On smaller screens, placing the content below the image often improves readability.
Keeping CSS Organized
As your slider grows in complexity, your stylesheet can become difficult to manage. A good practice is to organize your CSS into logical sections.
/* Layout */

/* Images */

/* Typography */

/* Buttons */

/* Navigation */

/* Pagination */

/* Responsive */
This makes future updates much easier, especially when working on larger projects.
Performance Tips
Even the best-designed slider can negatively affect website performance if it’s not optimized correctly.
- Use appropriately sized images instead of uploading unnecessarily large files.
- Prefer WordPress image sizes such as
medium_largeorlargeinstead offullwhenever possible. - Minify your CSS and JavaScript files in production.
- Only load Swiper.js on pages where the slider is actually used.
- Enable lazy loading for images to improve initial page speed.
- Compress images using modern formats such as WebP or AVIF.
Following these best practices helps improve Core Web Vitals and creates a faster browsing experience for your visitors.
Current Progress
Congratulations! You now have a custom WPBakery slider that not only functions correctly but also looks professional across different devices.
Your addon can now:
- Display unlimited slides.
- Show responsive images.
- Present well-formatted content.
- Support touch gestures.
- Include navigation arrows and pagination.
- Adapt to desktop, tablet, and mobile layouts.
However, there’s still one major improvement we can make. At the moment, many of the slider settings are hardcoded. In the next section, we’ll enhance our addon by adding configurable options such as autoplay, slider speed, loop mode, navigation toggles, pagination controls, responsive slide counts, and image size selection. These features will transform our basic slider into a production-ready WPBakery addon that can be reused across multiple WordPress projects.
Making Your WPBakery Slider Addon Production Ready
Our custom slider is now fully functional, but it’s still fairly basic. In a real-world WordPress project, clients often request additional controls such as autoplay, navigation arrows, pagination, transition speed, image sizes, and responsive layouts. Rather than hardcoding these options, it’s much better to expose them as configurable settings within WPBakery.
This is one of the biggest advantages of creating your own WPBakery addon. Instead of modifying code every time a client requests a small change, you can simply add another parameter to the element and let the user configure it directly from the page builder.
In this section, we’ll enhance our slider by adding professional features commonly found in premium WordPress slider plugins.
Adding General Slider Settings
Let’s start by giving users control over the slider’s behaviour. We’ll create a new group called Slider Settings to keep these options organized.
Add the following parameters after your param_group field.
array(
    'type'       => 'dropdown',
    'heading'    => __('Autoplay', 'mytheme'),
    'param_name' => 'autoplay',
    'value'      => array(
        'Yes' => 'yes',
        'No'  => 'no'
    ),
    'std'        => 'yes',
    'group'      => __('Slider Settings', 'mytheme')
),

array(
    'type'       => 'textfield',
    'heading'    => __('Autoplay Delay (ms)', 'mytheme'),
    'param_name' => 'delay',
    'value'      => '4000',
    'group'      => __('Slider Settings', 'mytheme')
),

array(
    'type'       => 'textfield',
    'heading'    => __('Transition Speed (ms)', 'mytheme'),
    'param_name' => 'speed',
    'value'      => '600',
    'group'      => __('Slider Settings', 'mytheme')
)
These three settings allow editors to control how quickly the slides change without modifying any JavaScript.
Adding Loop and Center Mode
Many sliders continuously loop through their content, while others stop when the final slide is reached. Instead of forcing one behaviour, let the user choose.
array(
    'type'       => 'dropdown',
    'heading'    => __('Loop Slides', 'mytheme'),
    'param_name' => 'loop',
    'value'      => array(
        'Yes' => 'yes',
        'No'  => 'no'
    ),
    'std'        => 'yes',
    'group'      => __('Slider Settings', 'mytheme')
),

array(
    'type'       => 'dropdown',
    'heading'    => __('Centered Slides', 'mytheme'),
    'param_name' => 'centered',
    'value'      => array(
        'Yes' => 'yes',
        'No'  => 'no'
    ),
    'std'        => 'no',
    'group'      => __('Slider Settings', 'mytheme')
)
Centered slides are particularly useful for testimonial sliders, logo carousels, and portfolio showcases.
Navigation Controls
Not every slider requires navigation arrows or pagination dots. Hero banners often include arrows, while logo sliders usually don’t. By making these options configurable, your addon becomes much more flexible.
array(
    'type'       => 'checkbox',
    'heading'    => __('Show Navigation Arrows', 'mytheme'),
    'param_name' => 'navigation',
    'value'      => array(
        'Yes' => 'yes'
    ),
    'group'      => __('Navigation', 'mytheme')
),

array(
    'type'       => 'checkbox',
    'heading'    => __('Show Pagination', 'mytheme'),
    'param_name' => 'pagination',
    'value'      => array(
        'Yes' => 'yes'
    ),
    'group'      => __('Navigation', 'mytheme')
)
Grouping related settings makes the WPBakery settings window much easier to navigate, especially when your addon grows larger.
Responsive Slides Per View
One of the most requested features in any slider is responsive control over the number of visible slides. Instead of hardcoding one slide for every device, we can allow users to configure desktop, tablet, and mobile layouts independently.
array(
    'type'       => 'textfield',
    'heading'    => __('Desktop Slides', 'mytheme'),
    'param_name' => 'desktop',
    'value'      => '3',
    'group'      => __('Responsive', 'mytheme')
),

array(
    'type'       => 'textfield',
    'heading'    => __('Tablet Slides', 'mytheme'),
    'param_name' => 'tablet',
    'value'      => '2',
    'group'      => __('Responsive', 'mytheme')
),

array(
    'type'       => 'textfield',
    'heading'    => __('Mobile Slides', 'mytheme'),
    'param_name' => 'mobile',
    'value'      => '1',
    'group'      => __('Responsive', 'mytheme')
)
These values will later be passed to Swiper.js so that the slider automatically adapts to different screen sizes.
Choosing the Image Size
Loading full-size images for every slider can significantly slow down your website. WordPress automatically generates multiple image sizes whenever an image is uploaded, so it’s a good idea to let users choose which version should be displayed.
array(
    'type'       => 'dropdown',
    'heading'    => __('Image Size', 'mytheme'),
    'param_name' => 'image_size',
    'value'      => array(
        'Thumbnail' => 'thumbnail',
        'Medium'    => 'medium',
        'Large'     => 'large',
        'Full'      => 'full'
    ),
    'std'        => 'large',
    'group'      => __('Design', 'mytheme')
)
For most sliders, the large image size provides an excellent balance between quality and performance.
Adding an Extra CSS Class
One simple but incredibly useful feature is the ability to add a custom CSS class. This allows developers to apply different styles to individual sliders without modifying the shortcode.
array(
    'type'       => 'textfield',
    'heading'    => __('Extra CSS Class', 'mytheme'),
    'param_name' => 'el_class',
    'description'=> __('Optional custom class for additional styling.', 'mytheme'),
    'group'      => __('Advanced', 'mytheme')
)
For example, one slider might have a dark theme, while another uses a light theme, all controlled through CSS.
Adding a Custom Element ID
If you plan to use multiple sliders on the same page, assigning a unique ID to each instance makes JavaScript targeting much easier.
array(
    'type'       => 'textfield',
    'heading'    => __('Element ID', 'mytheme'),
    'param_name' => 'el_id',
    'description'=> __('Optional unique HTML ID.', 'mytheme'),
    'group'      => __('Advanced', 'mytheme')
)
This is especially useful when creating custom animations or linking buttons directly to a specific slider.
Updating the Shortcode
Once you’ve added these new parameters, don’t forget to update your shortcode so it receives the additional values.
$atts = shortcode_atts(array(

    'slides'      => '',
    'autoplay'    => 'yes',
    'delay'       => '4000',
    'speed'       => '600',
    'loop'        => 'yes',
    'centered'    => 'no',
    'navigation'  => '',
    'pagination'  => '',
    'desktop'     => '3',
    'tablet'      => '2',
    'mobile'      => '1',
    'image_size'  => 'large',
    'el_class'    => '',
    'el_id'       => ''

), $atts);
Having sensible default values ensures the slider continues to work even if a user leaves some settings unchanged.
Passing Settings to JavaScript
To make these options control the slider’s behaviour, you can output them as data-* attributes on the slider container. Your JavaScript can then read these values and initialize Swiper accordingly.
For example, your slider wrapper might include attributes such as:
<div
    class="custom-slider swiper"
    data-autoplay="yes"
    data-delay="4000"
    data-speed="600"
    data-loop="yes"
    data-desktop="3"
    data-tablet="2"
    data-mobile="1">
This approach keeps your PHP and JavaScript loosely coupled, making the addon easier to maintain and extend.
Why These Features Matter
At this point, your slider is no longer just a simple tutorial project. It has become a reusable component that can be used across different websites with minimal changes.
By exposing common settings through the WPBakery interface, you make the addon useful not only for developers but also for designers, content editors, and clients who may never write a single line of code.
This is exactly how many premium WPBakery addons are built—they combine a flexible settings panel with a reusable shortcode and a well-structured front-end component.
Our addon is now feature-rich, but there’s one final step before it’s truly production-ready. In the next section, we’ll cover security, performance, and WordPress coding best practices, including proper data sanitization, escaping output, conditional asset loading, caching strategies, and common mistakes to avoid when building custom WPBakery elements.
Security, Performance, and Best Practices for WPBakery Addons
Congratulations! At this stage, you’ve built a fully functional custom slider addon for WPBakery Page Builder. However, writing code that works is only part of the job. A professional WordPress developer also considers security, performance, maintainability, and compatibility.
Whether you’re building a custom slider, testimonial carousel, pricing table, or any other WPBakery element, following WordPress best practices will make your addon more reliable and easier to maintain in the future.
Always Escape Output
Every value entered by a user should be escaped before it’s displayed on the front end. Even if you trust the website administrator, escaping output is a standard WordPress security practice that helps prevent unexpected HTML rendering and cross-site scripting (XSS) vulnerabilities.
Different types of content require different escaping functions.
| Function | Use For |
|---|---|
esc_html() |
Headings and plain text |
esc_attr() |
HTML attributes |
esc_url() |
URLs and links |
wp_kses_post() |
Limited HTML content |
For example:
<h2><?php echo esc_html( $title ); ?></h2>

<a href="<?php echo esc_url( $url ); ?>">
    Learn More
</a>
Never print user-entered content directly without sanitizing or escaping it.
Sanitize Input Before Saving
While WordPress and WPBakery handle much of the input process, it’s still good practice to sanitize values whenever you process custom data.
For example:
$title = sanitize_text_field( $title );This removes unwanted characters and ensures your data remains clean before being stored or processed.
Load Assets Only When Needed
Many developers make the mistake of loading CSS and JavaScript files on every page of the website, even when the slider isn’t being used.
Although this works, it increases the number of HTTP requests and slightly affects page performance.
A better approach is to enqueue assets only when the shortcode exists on the page.
if ( has_shortcode( get_post()->post_content, 'custom_slider' ) ) {

    wp_enqueue_style( ... );

    wp_enqueue_script( ... );

}
Conditional loading keeps your website lightweight and improves Core Web Vitals.
Use WordPress Image Sizes
One of the easiest ways to improve slider performance is by avoiding full-size images unless they’re absolutely necessary.
Instead of manually creating image URLs, use WordPress image sizes.
wp_get_attachment_image(
    $image,
    'large'
);
WordPress automatically serves an appropriately sized image, reducing download size and improving page speed.
Support Responsive Images
The wp_get_attachment_image() function also generates responsive image markup using the srcset and sizes attributes.
This allows browsers to download the most appropriate image size for the visitor’s screen, reducing bandwidth usage and improving loading times.
This is another reason why it’s preferred over manually creating an <img> tag.
Avoid Inline CSS and JavaScript
While it’s tempting to output CSS and JavaScript directly inside your shortcode, this quickly becomes difficult to maintain.
Instead, keep your project organized by separating responsibilities.
- PHP generates the HTML.
- CSS controls the appearance.
- JavaScript adds interaction.
This separation makes your addon easier to debug, extend, and reuse.
Choose Unique Names
WordPress websites often use dozens of plugins. If your shortcode or function names are too generic, they may conflict with another plugin.
Avoid names like:
slider()Instead, use a unique prefix.
mytheme_custom_slider_shortcode()Using prefixes is considered standard practice in WordPress development.
Keep Your Code Modular
As your collection of WPBakery elements grows, your project should remain well organized.
A clean structure might look like this.
inc/

    wpbakery/

        custom-slider.php

        testimonials.php

        team.php

        pricing-table.php

        accordion.php

        logo-carousel.php
Each element lives in its own file, making maintenance much easier as your project expands.
Document Your Code
Adding comments may seem unnecessary during development, but they become invaluable when revisiting a project months later.
For example:
/**
 * Register Custom Slider
 */

function mytheme_custom_slider_element() {

}
Good documentation also makes collaboration with other developers much easier.
Common Mistakes to Avoid
Even experienced developers occasionally run into issues when building custom WPBakery addons. Here are some of the most common mistakes and how to avoid them.
| Mistake | Better Approach |
|---|---|
| Loading Swiper.js multiple times | Reuse the registered script whenever possible. |
| Using full-size images everywhere | Use appropriate WordPress image sizes. |
| Printing raw user input | Escape all output using WordPress functions. |
| Writing all code in functions.php | Split your addon into separate files. |
| Hardcoding slider settings | Expose them as WPBakery parameters. |
| Ignoring responsive layouts | Test on desktop, tablet, and mobile devices. |
Packaging Your Addon for Reuse
If you build custom WPBakery elements regularly, consider moving them into a standalone WordPress plugin instead of keeping them inside a theme.
This allows you to reuse the same addon across multiple websites without copying files between projects.
A reusable plugin also simplifies updates and makes version control much easier.
Final Thoughts
Building your own WPBakery addon may seem intimidating at first, but once you understand the workflow, it becomes a straightforward process. Every custom element follows the same pattern: register the element with vc_map(), define its settings, process the shortcode attributes, generate the HTML output, and enhance the experience with CSS and JavaScript.
Although we used a responsive slider as our example, the same techniques can be applied to almost any custom component you need. Whether you’re creating testimonials, pricing tables, post grids, team members, image galleries, logo carousels, or advanced content sections, the development process remains largely the same.
By building your own addons instead of relying on third-party plugins, you gain complete control over functionality, design, and performance. Your websites become easier to maintain, your code becomes more reusable, and your clients benefit from a cleaner editing experience inside WPBakery Page Builder.
As you continue developing custom elements, you’ll discover that WPBakery is far more flexible than many developers realize. With a solid understanding of vc_map(), shortcodes, and WordPress development best practices, you can create powerful, reusable components tailored to any project.
Frequently Asked Questions
Can I create custom WPBakery elements without a plugin?
Yes. You can register custom elements directly from your WordPress theme by including your PHP files in functions.php. However, if you plan to reuse the same elements across multiple websites, packaging them as a custom plugin is usually the better approach.
Is vc_map() still supported?
Yes. vc_map() remains the standard method for registering custom elements in WPBakery Page Builder and is widely used by theme and plugin developers.
Can I use ACF fields inside a custom WPBakery addon?
Absolutely. Advanced Custom Fields (ACF) integrates well with WPBakery, allowing you to retrieve custom field values inside your shortcode and display dynamic content.
Can I create WooCommerce sliders using the same method?
Yes. Instead of manually creating slides, you can query WooCommerce products using WP_Query and display them inside the same Swiper slider structure.
Can I use this approach for testimonials, team members, and FAQs?
Yes. The workflow demonstrated in this tutorial is reusable. By changing the fields inside the param_group and updating the shortcode output, you can build almost any custom WPBakery element.
You now have all the knowledge needed to create professional, reusable WPBakery addons that are secure, performant, and easy to maintain. The same foundation can be used to build an entire library of custom elements tailored to your projects and your clients’ needs.






Leave a Reply