Github Tutorial for Beginners step by step
Posted on by ChandanIf you are new to programming and joined a company, you might have heard of Github. In this article, we will take a tour of Github tutorial for Beginners and we will learn everything step by step. From the last 2o years, it is very famous and everybody is talking about it. So, what is Git and how programmers and developers using it and how we can use it? We will learn everything here in Our Git tutorial.
Github introduction
Github was created by Linus Torvald, the same person who has developed the Linux Kernel. Linux kernel is open source and you can contribute to living anywhere in the world. In this programming world, many people do programming and work on a project. So, how can they manage everything in one project? It is not easy to manage. For example, if 5-10 people work on the software it will be very difficult to manage it. So The Linus Torvald came with a concept called Git. It handles all those things of merging different source code from different people and maintaining versions. https://github.com/login
How does it work?
Git is actually a Distributed Version Control System. If you are alone and working on a project you will write code and make a small version of your project after getting a requirement from a customer. Now, after some time you think of adding more features on your software. Then you will change some code of your project and add the new feature. After you show these feature to a client , then he says we don’t want these features. Then you have to change again and remove those. After some time, the client says, “remember that feature you shown me that day, that was awesome, please add that in our project as well”. Then what you will do is write again all the changes and add the code for that feature. But if you have a backup, then easily you can change those without consuming a lot of time.
So, what we do is to maintain all the different versions we have a version control system. For example, when you release your first product, it will be a snapshot_version. After some time you think this is the final version to launch and that will be your 1.0. After some time it will go like 1.1, 1.2, 1.3, 1.4, 2.0 and so on. Now if you want the older version 1.2 for some reason, is it possible? So, instead of using Dropbox or your hard drive to create different folders for different versions, we have this concept of the control system.
Centralized version control system (CVCS) and Distributed version control system:
Earlier people used to work with a centralized version control systems (CVCS) and now they use Distributed version control systems (DVCS: – GIT). Let’s know about CVCS. It was having multiple computers or maybe one computer and one server, so all the versions are stored in the server. So, what happens was every time you write code on your computer and you add new feature then the previous version was stored in the server. So, this was a centralized system.
The drawbacks of this system are that you have a working copy of your project but the versions are maintained in the server. But, what happens when this server fails for some reason? You will lose all your data from the server. It may happen, we are living in a world of hackers anything is possible. What if you are traveling somewhere and you don’t have an internet connection, then how can you connect with the server or the repository? If the server fails everything will be lost.
In a company, every project data is stored on a single server and there are multiple computers connected with the server. Every computer has its own copy of the project locally. Also, we will have a local repository and remote repository. Now the advantage we have is, even if the server fails, we have a local copy in our local repository. Here every developer has a copy of the project. so, this is called distributed. So, when we don’t have an internet connection, we can work on the project and create versions, and whenever the internet comes back, we can push it on the server.
Git is a Distributed version control system and it doesn’t do everything on its own. You have to give some commands to do it for you, for example, commit, push, etc.
More features of Git:
Trunk-based development: Let’s say you are working on a project. It is in development from a long time and currently you are working is 6.7 and it’s stable. Now we have to do a major change in our project and then it will be 7.0 (major version). Now while working in 7.0 and someone says that there is a bug in your 6.7. Then what you will do? In Git, there is a concept called the branch. If you are working on the same branch and working on 7.0, you will lose all your previous data from 6.7. So, the solution is to open a new branch at 6.7 and work freely in 7.0. Then you can work in both the versions and after the bug fix, you can merge those two.
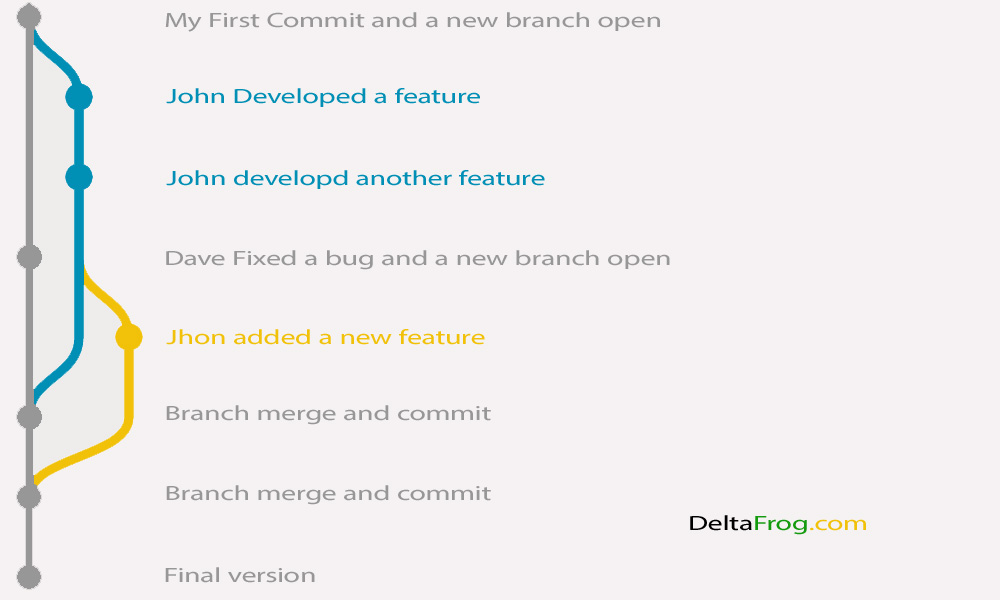
So, this is a trunk based development.
We can download Git for free. If you’re Mac OS user or Linux you can download Git and install. If you are working on windows, then you have to download and install Git Bash. We will focus on Github on windows. As there are other online repositories also available on the web like bitbucket, Gitlab, etc. But Github is the most famous and popular.
Step by Step tutorial for using Git for Github on Windows
Step1: Creating an account on Github.
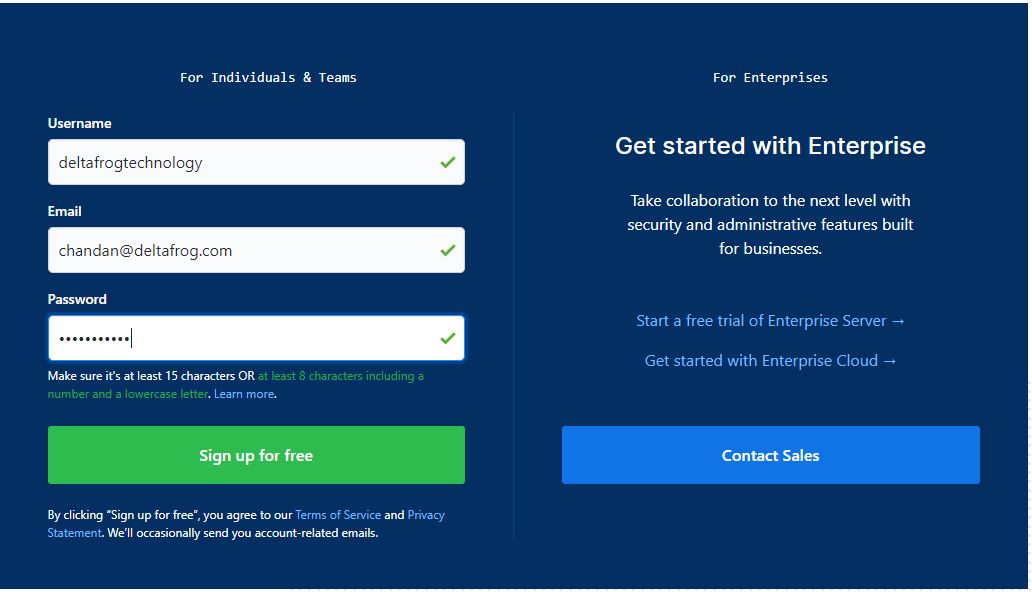
We will open Github.com and create my account. It will ask for username, email and password at first. We will fill those and click on Sign up for free. After verifying everything like the email address you complete the signup process.
After logging in you can see your profile, repositories, etc.
Step2: Create a Repository.
The first thing you need is to have a repository. You will not have any repositories by default. You have to create it. Here you can store your projects.

Click on New button and create one.
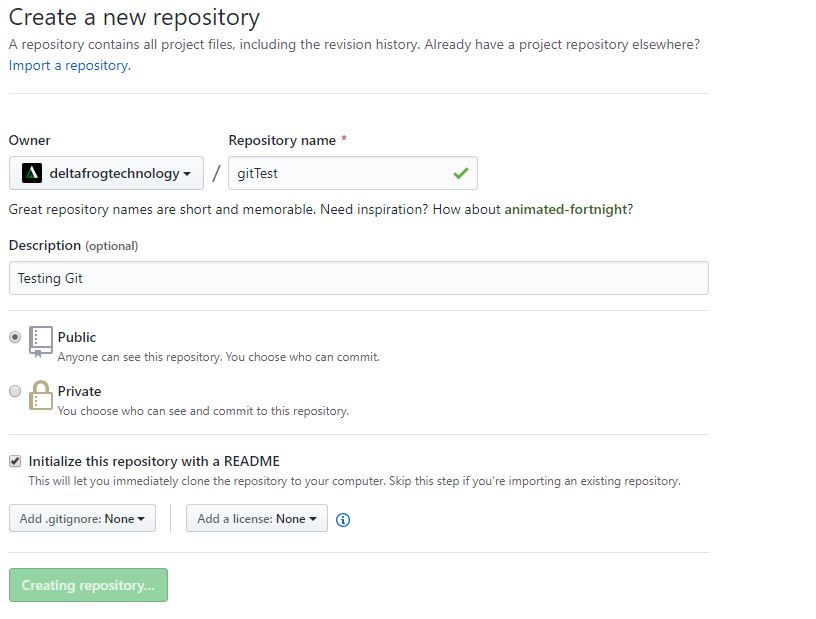
So, we have created a repository named gitTest successfully with a read me file. The README.md file has an extension .md which stands for MARKDOWN. You can see below the blank repository overview. Every time you change anything in your repository, you’re doing a commit. You can see below there is 1 commit in the repository.
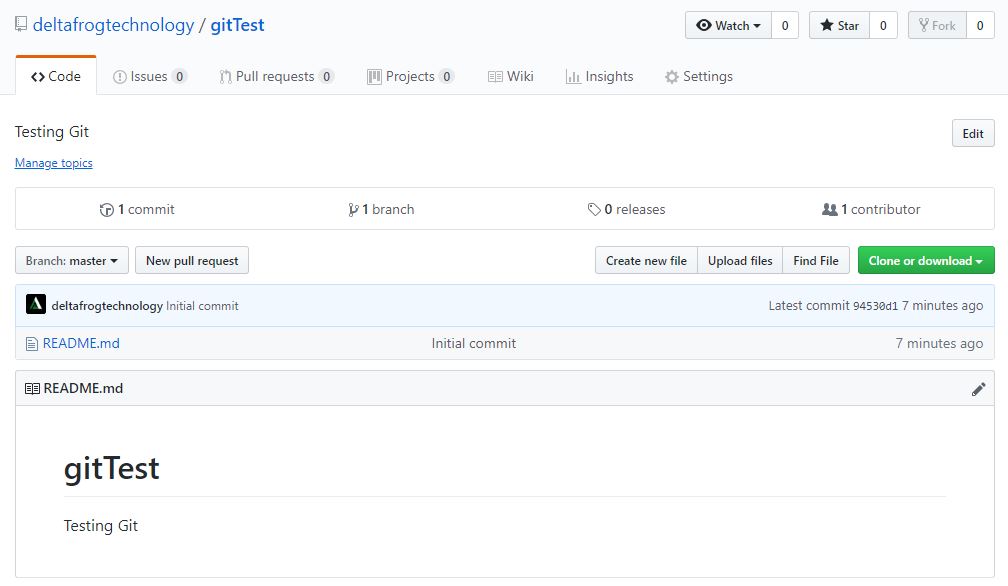
Now we will add a new file. It can have any name or extension (GIT supports all the files. For example, it can be a java file, PHP file, HTML files, etc. depending upon your choice).
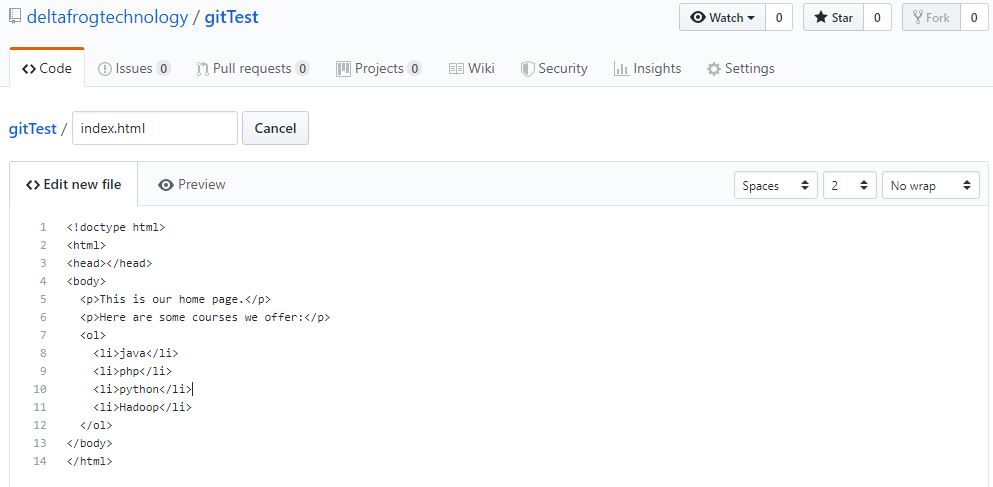
Now save this file:
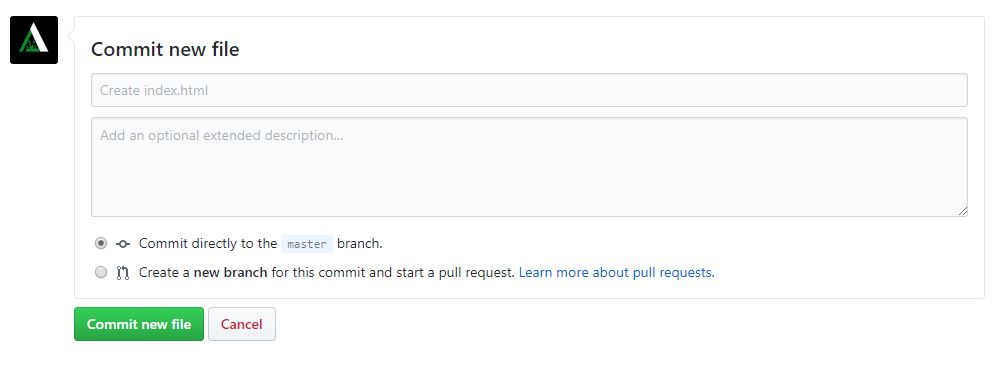 We are creating a new file, so this will also be a commit.
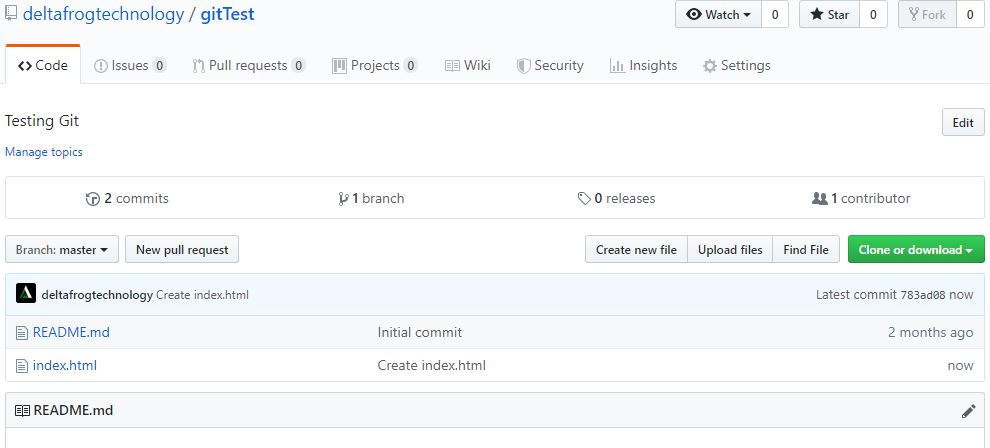
Now you can see the created file also commit is increased.
Now we will change something in our index.html file and add a new course. Below we have opened the file again and added Linux in the courses list. Also, we have added a comment on the change.
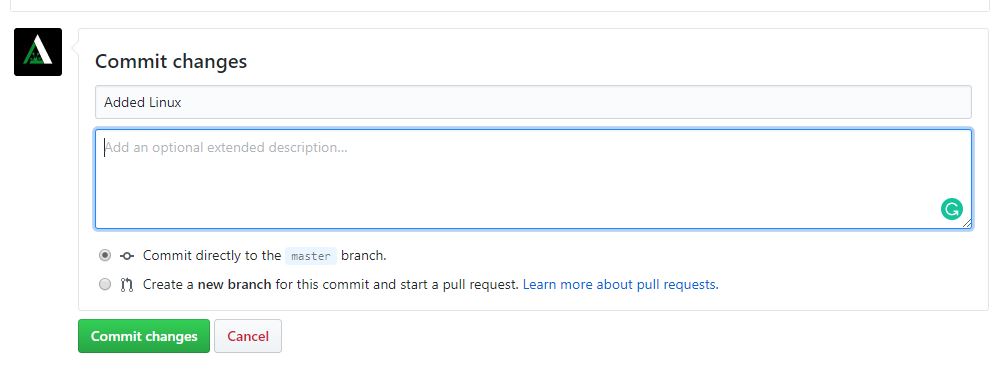
So this is the concept behind commit. Now let’s say after some time we feel that Linux should not be in our course. So, we can do two things.
- We can do another commit and remove Linux.
- We can go back to the previous version.
Whatever is easier we can do, both the method id cool. But think about a real-world project you are working on and you want to go back to the previous version because you feel its time-taking to remove the stuff.
You can click on the “3 commits” in your repository and see all the versions.
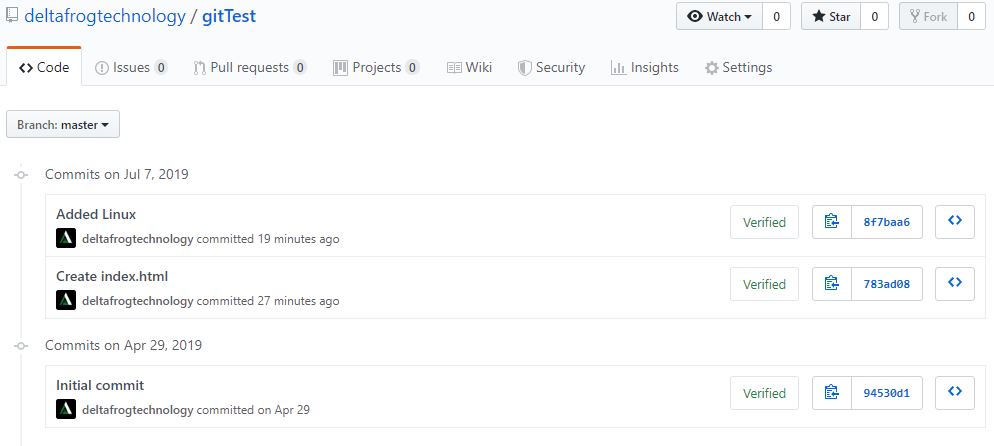
You can see all the versions of your commits and you can see all the changes after clicking on the commits. This is the awesomeness of using a version control management system.
Step 3: Create a branch, pull request and merge.
Till now we were doing every commit in our master branch. What if we have to create a feature for our project that may be implemented later. But we want to make this now and see how it works. In order to do this, we need to create a branch of our project, so that it will not affect our master branch. In the snippet below, you can see that I have added a new feature to use later on.
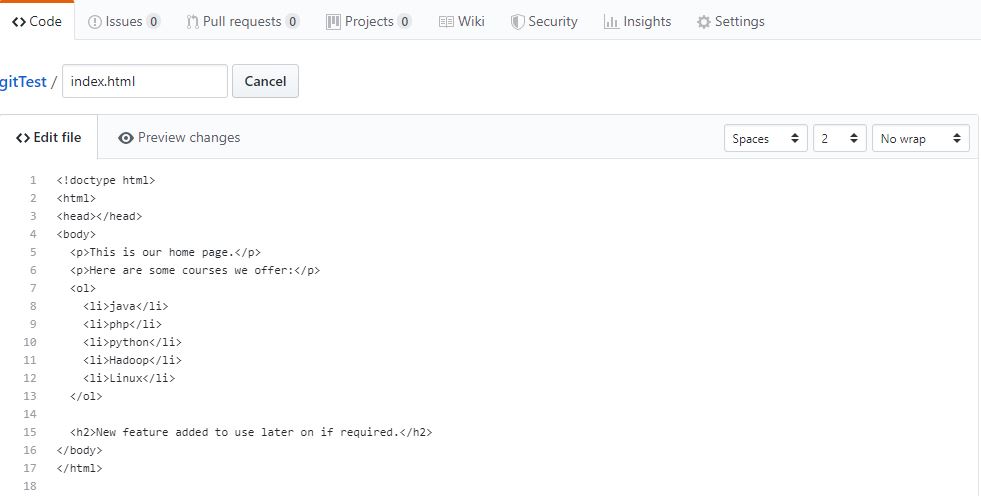
Now we will commit in another branch.
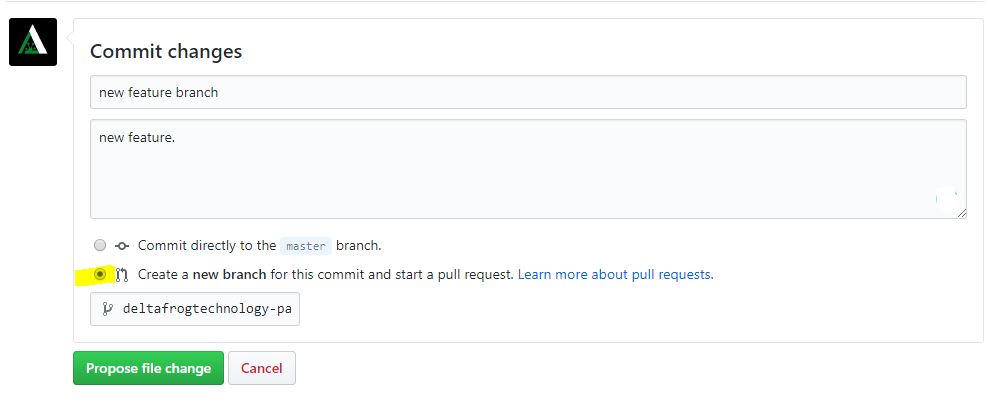
Now after you add a new branch, you will see a page to create a pull request. The pull request tells other people about changes in your branch. So creating a pull request is good.
Now after doing these things. you can merge these two branches anytime. Now your repository will look like this:
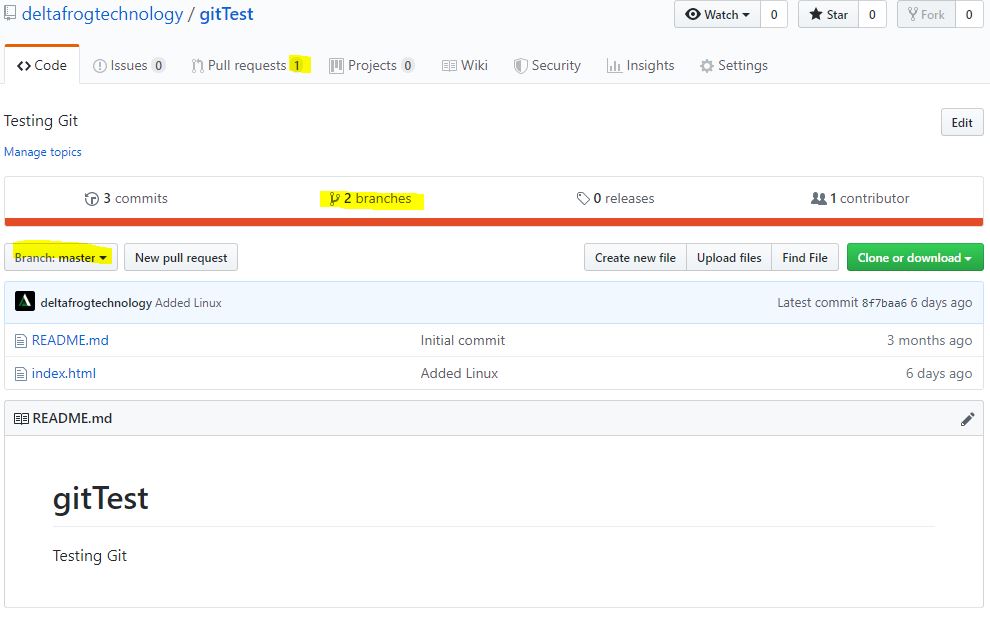
You can see 1 pull request, 2 branches (master and new feature). You can switch branches by clicking on the branch: master at the left.
Now we will merge the two branches into one. to do so, you need to go to pull request and you can see the branches there.
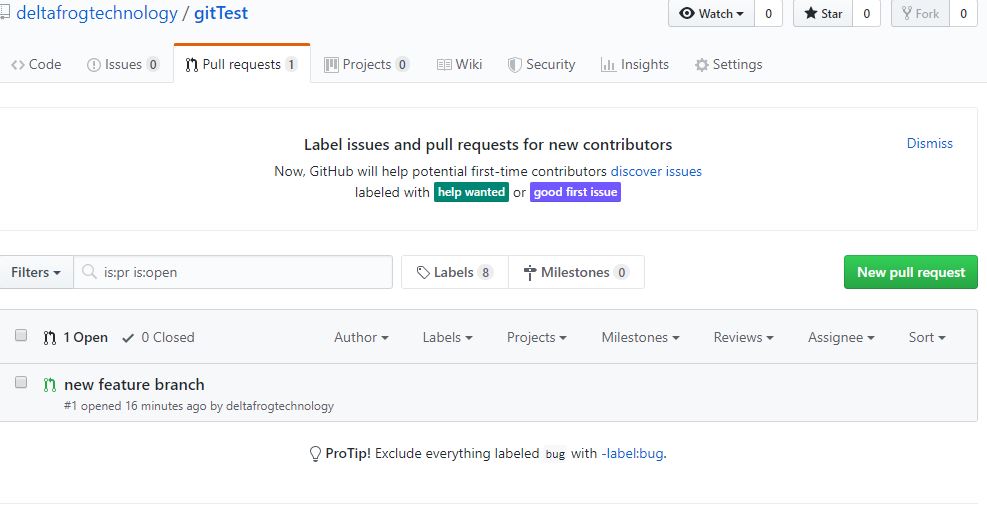
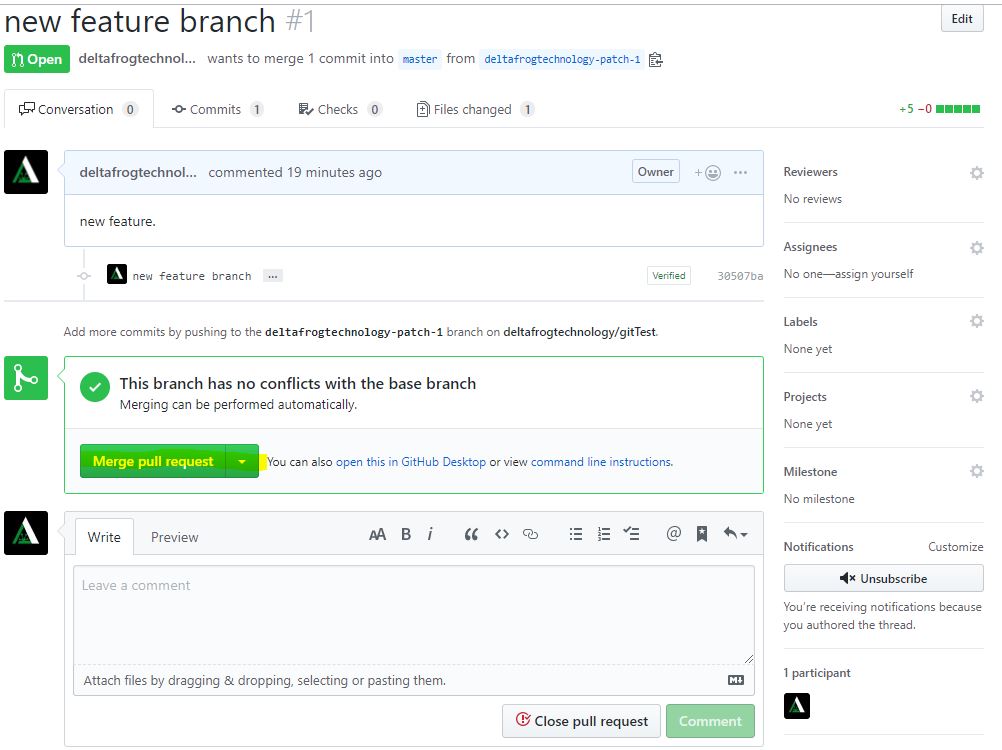
Now click on that branch named new feature. You will see an option to merge two branches. You can also see there are no conflicts with the base branch. If you have issues then GitHub will guide you to resolve the issue. Github is very smart in doing these.



Leave a Reply