How to create custom plugin in WordPress step by step with Example
Posted on by ChandanHey, I think you are a web developer and worked on developing WordPress custom themes and WordPress Website. Now you want to learn more about making a custom Plugin according to your requirement. If you don’t know how to build a custom theme from scratch, Just stop right here and don’t waste time in learning this tutorial.

There are many tutorials available and if you know better tutorial than this, please follow that.
Welcome to this exciting adventure . Yes, you are in the right place where you will take away this awesome knowledge about WordPress Plugin development step by step, covering all the technical aspects with Example.
WordPress Plugin development is a bit tough ask,because it involves many WordPress functions that will be new to you if you are a Beginner. But if you can setup it beautifully, you will not face any trouble.
What we aspect from you:
- Basic PHP, JAVASCRIPT/JQUERY , HTML, CSS, etc.
- PHP OOPS : A Basic knowledge and understanding of Object Oriented PHP . Because we will use this.
- Basic understanding of WordPress Hooks and filters.
- $wpdb : used for wordpress database handling.
Without wasting any time lets move on. Please go through this tutorial step by step, and try it on your Local machine.
SETUP THE ENVIRONMENT FOR PLUGIN DEVELOPMENT
Step1: This is the very first step in our tutorial . Before building , the first thing you need to do is: open wp-config.php and define WP_DEBUG to true. You will find this file in the WP installation root.
define('WP_DEBUG', true);
If this global setting (WP_DEBUG) is not true then, you will face difficulty to know your errors, for example if you write any bad PHP code you will get warned. So, we need all the debugging information in this development period.
Step2: Know your playground: Please do not touch any WordPress core installation files. You are only allowed to touch the wp-content folder. The other folders like wp-admin, wp-includes are part of the core installation. We need to create a plugin, so we will use the plugins folder inside wp-content folder.

You can see the plugins folder, under this , you need to make folder and give that a name. For Example, we are making a plugin AtiBlog Test :

Under this make a directory structure and files like this:

Directory Structure:
assets folder: It will contain the files and libraries of css, js , fonts, etc. You can make individual folders for these types to be more particular.
inc folder: It will contain all the includes we will use in the plugin’s main file. For Example the plugin activation, deactivation and deletion part.
templates folder: It will contain all the templates we will use for the front-end or back-end pages. For example, we need to make 5 pages inside Back-administration, then we have to make 5 templates for each. Because we don’t want to mess things up. Making separate templates for each is very useful.
atiblogtest.php: It is the plugins main file. You can say that, the plugin will start from here.
index.php: It will be a blank php file, that will contain a comment line. This is used as a security purpose, so that if a user can’t get direct access to your plugin from the browser. For example, you can see the index.php present in the plugins folder. And you can see the comment as “Silence is Golden”. We will use the same here in AtiBlogTest .
Working with main file
Step3: atiblogtest.php: This file is a starting point , so we will include the following things at the top :
<?php
/**
 * @package AtiBlogTest
 * @version 1.0
 */
/*
Plugin Name: AtiBlogTest
Plugin URI:
Description: This is my test plugin
Author: Chandan Kumar (Your Name)
Version: 1.0
Author URI:
Licence: GPLv2 or later
Text-domain:AtiBlogTest
*/
After saving this file you will see this plugin in your plugin’s page.
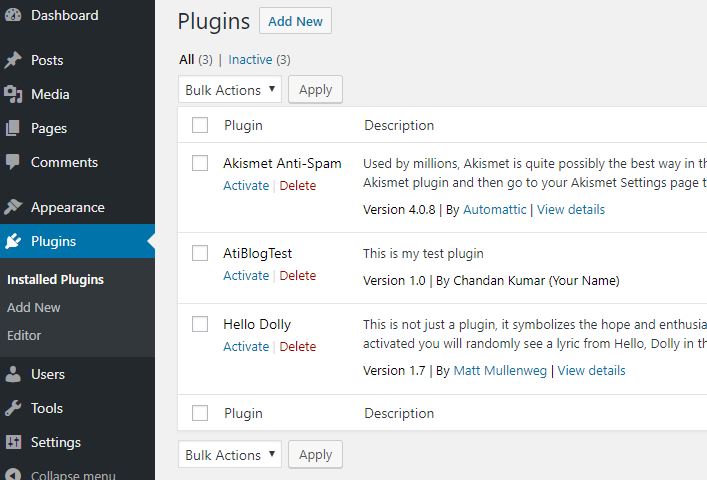
Step4: Currently, the activate, deactivate and delete functionality will not work because we haven’t written any code for it yet. Now we will write some code in AtiBlogTest.php. But before that, we will add three files, activate.php, deactivate.php,delete.php in the ‘inc’ folder .

We will see the delete.php later, because it will delete the plugin from directory.
Activating and deactivating the plugin:
Step5: Now we will see what activate.php and deactivate.php will contain.
activate.php will contain the following code:
<?php

/**
* @package AtiBlogTest
* Trigger this file on plugin activation
**/

class AtiBlogTestActivate {

	static function activate(){
		flush_rewrite_rules();
	}
}
deactivate.php will contain the following code:
<?php

/**
* @package AtiBlogTest
* Trigger this file on plugin deactivation
**/

class AtiBlogTestDeactivate {

	static function deactivate(){
		flush_rewrite_rules();
	}
}
Both the files will contain a class and a static method, so that we can access these functions directly from outside the class. We will call these static methods from atiblogtest.php. These functions will be used as a callback function for the activation and deactivation hooks.
‘flush_rewrite_rules()’ function is used for delete rewrite rules and recreate it. This is a very good practice for plugin development. By doing this you can remove any urls made by your plugin. For example any custom post type.
Step6: Working with the main plugin file. (atiblogtest.php) :
Add the licence at top after the plugin info if you have any. Then we will add a security statement :
if( !defined( 'ABSPATH' ) ) {
	die;
}
Then we will add the hooks:
require_once plugin_dir_path( __FILE__ ) . 'inc/activate.php';
register_activation_hook( __FILE__, array('AtiBlogTestActivate','activate') );
require_once plugin_dir_path( __FILE__ ) . 'inc/deactivate.php';
register_deactivation_hook( __FILE__, array('AtiBlogTestDeactivate','deactivate') );
Now your file will look like this:
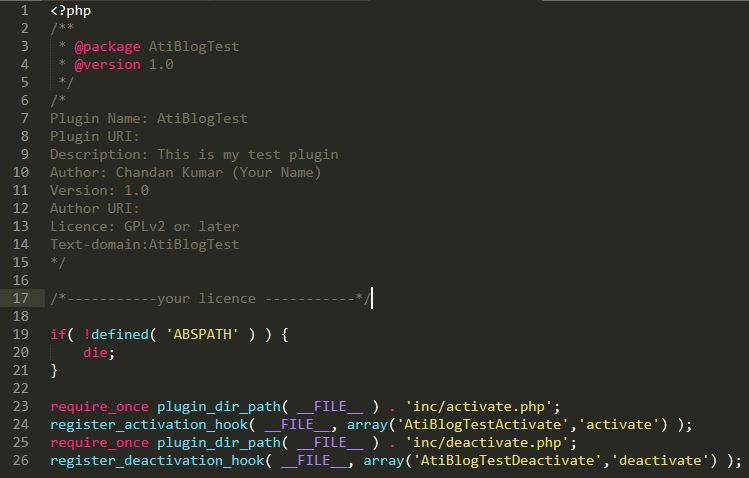
The ‘register_activation_hook’ and the ‘register_deactivation_hook’ takes two arguments,
a) The path to the main plugin’s file
b) The callback function after executing this hook. Here we have passed an array which contains the classname/objectname(If you want to access with object) and the method name, both as string.
The constant ‘__FILE__’ contains the absolute path to the main plugin’s file. You can echo it to check.
The best practice is to use composer autoload without using any require_once, include_once. I have added a article about it.
Adding javascript and css files in our example plugin
Step7: Adding scripts and styles in front-end and back-end. Before extending our plugin we will create a class named ‘AtiBlogTest’ and we will do all the work here. Then we will create a object and access the methods inside this class.
class AtiBlogTest {
	function register(){
		//for backend
		add_action( 'admin_enqueue_scripts', array($this,'backendEnqueue'));
		//for frontend
		add_action( 'wp_enqueue_scripts', array($this,'frontendEnqueue'));
	}
	function backendEnqueue(){
		wp_enqueue_style( 'AtiBlogTestStyle', plugins_url( '/assets/css/admin_mystyle.css', __FILE__ ));
		wp_enqueue_script( 'AtiBlogTestScript', plugins_url( '/assets/js/admin_myscript.js', __FILE__ ));
	}
	function frontendEnqueue(){
		wp_enqueue_style( 'AtiBlogTestStyle', plugins_url( '/assets/css/front_mystyle.css', __FILE__ ));
		wp_enqueue_script( 'AtiBlogTestScript', plugins_url( '/assets/js/front_myscript.js', __FILE__ ));
	}
}

if(class_exists('AtiBlogTest')){
	$atiblogtest=new AtiBlogTest();
	$atiblogtest->register();
}
Then we will create css and js files and save inside assets/css and assets/js folder.
Now we will test these files and js working or not:
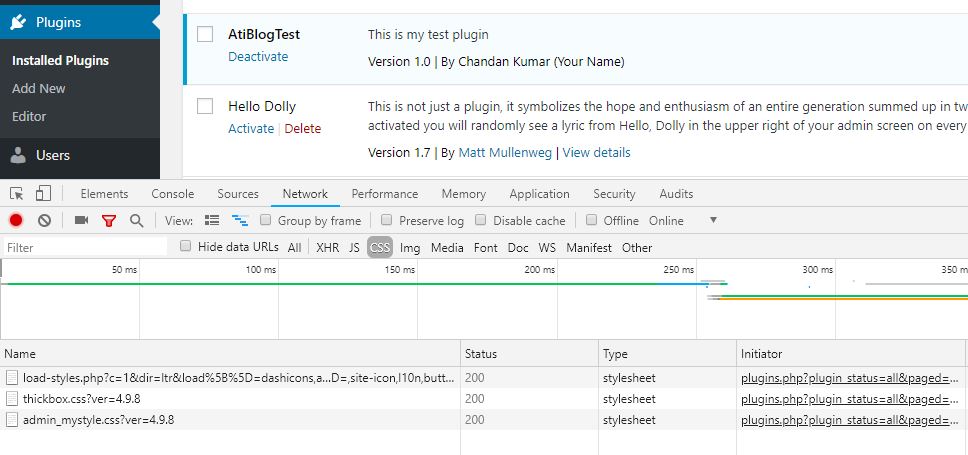
open inspector and see these files in network tab -> CSS & JS .
In the following screenshot you can see our css file (admin_mystyle.css) in the WordPress back-end. Similarly, you can see the front end website and test these files working or not.
Creating Plugin’s pages and menus
We are going nicely in our plugin building tutorial. Now we will add menu and pages in our WordPress dashboard. We already have a function register that runs when the plugin is activated. So, we will write ‘admin_menu’ action hook in the register function to hook our menu.
<?php add_action('admin_menu',array($this,'add_admin_pages')); ?>
Now we will write the function add_admin_pages in our class to add menu page. In this function we will use the WordPress built in method:
add_menu_page($page_title,$menu_title,$capability,$menu_slug,callback_function,$icon_url,position_of_button);.
You can see the WordPress documentation for the details of this method. In the callback function we have added the require template, that will be executed when visiting to this page.
<?php
function add_admin_pages(){
// this is a builtin method of WordPress:
 add_menu_page('AtiBlogTest','AtiBlogTest','manage_options','atiblogtest_plugin',array($this,'admin_index'),'',110);
}
function admin_index(){
//require template
  require_once plugin_dir_path( __FILE__ ) . 'templates/adminindex.php';
}
?>
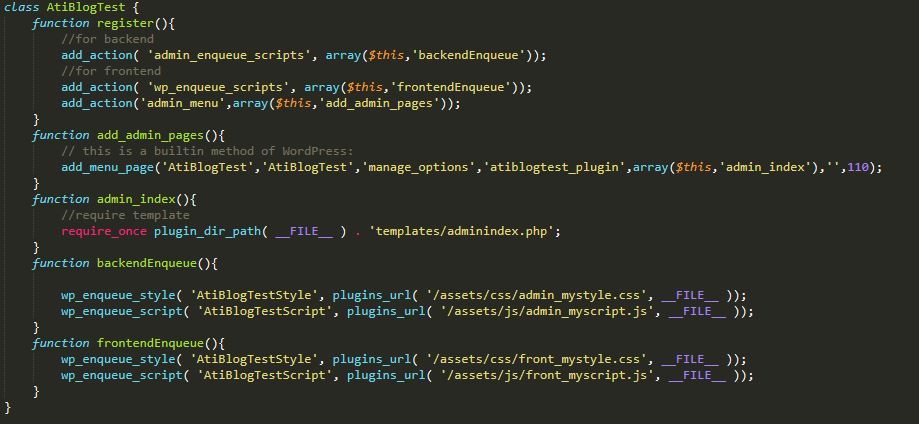
Now , You can jump into the templates folder and create many templates and define those in the main class. The basic idea behind this is dividing the work for each page of our plugin. May be this approach do not suit with your programming practice, then switch to your own way of doing that. There is nothing like your approach is wrong or this approach is wrong.
How to add links to your plugin on plugins page
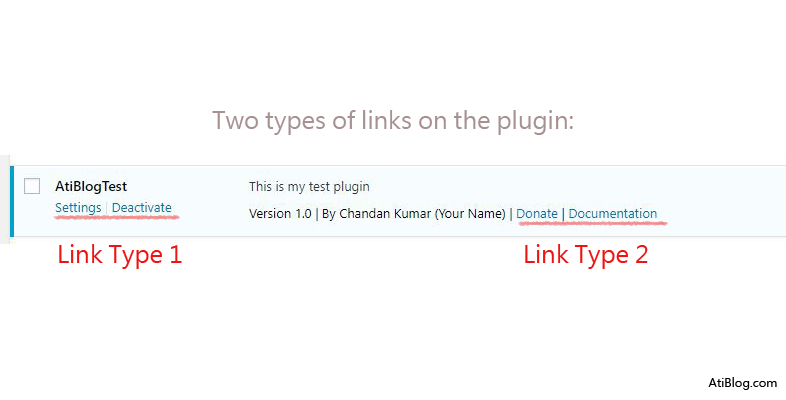
Step 8: Now we will add links to our plugin on the plugins page. There are two types of functions to use for the links.
In the above image you can see the both types of links.
For the Link type 1 use the following code in your class:
add_action( 'plugin_action_links_' . plugin_basename( FILE ), array($this,'plugin_links') );


function plugin_links( $links ) {
        $links = array_merge( array(
            '' . __( 'Settings', 'textdomain' ) . ''
        ), $links );
        return $links;
    }
For the Link type 2 use the following code in your class:
add_filter( 'plugin_row_meta', array($this,'plugin_row_meta_links'), 10, 2 );
function plugin_row_meta_links( $links, $file ) {
$base = plugin_basename( FILE );
if ($file == $base ) {
$new_links = array(
'donate' => 'Donate',
'doc' => 'Documentation'
);$links = array_merge( $links, $new_links ); } return $links;}
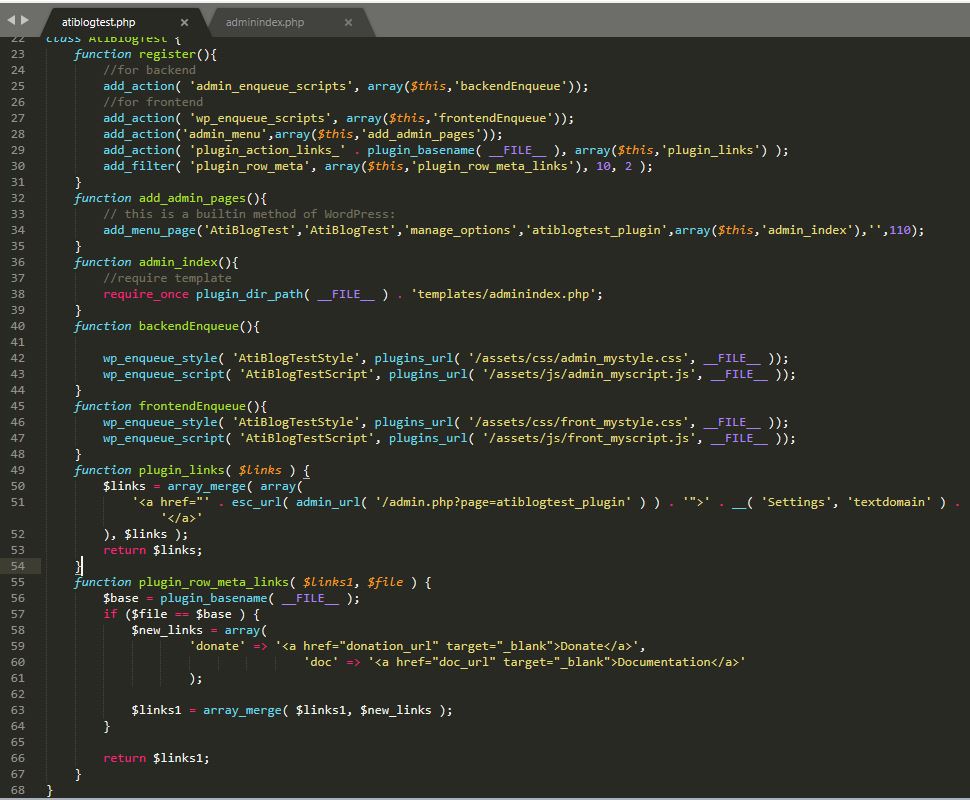
Here you can see that I have added both the links code in our class.
Resources:


[…] How to create custom plugin in WordPress step by step with Example […]